Blender - DeepDive
Blender Rendering
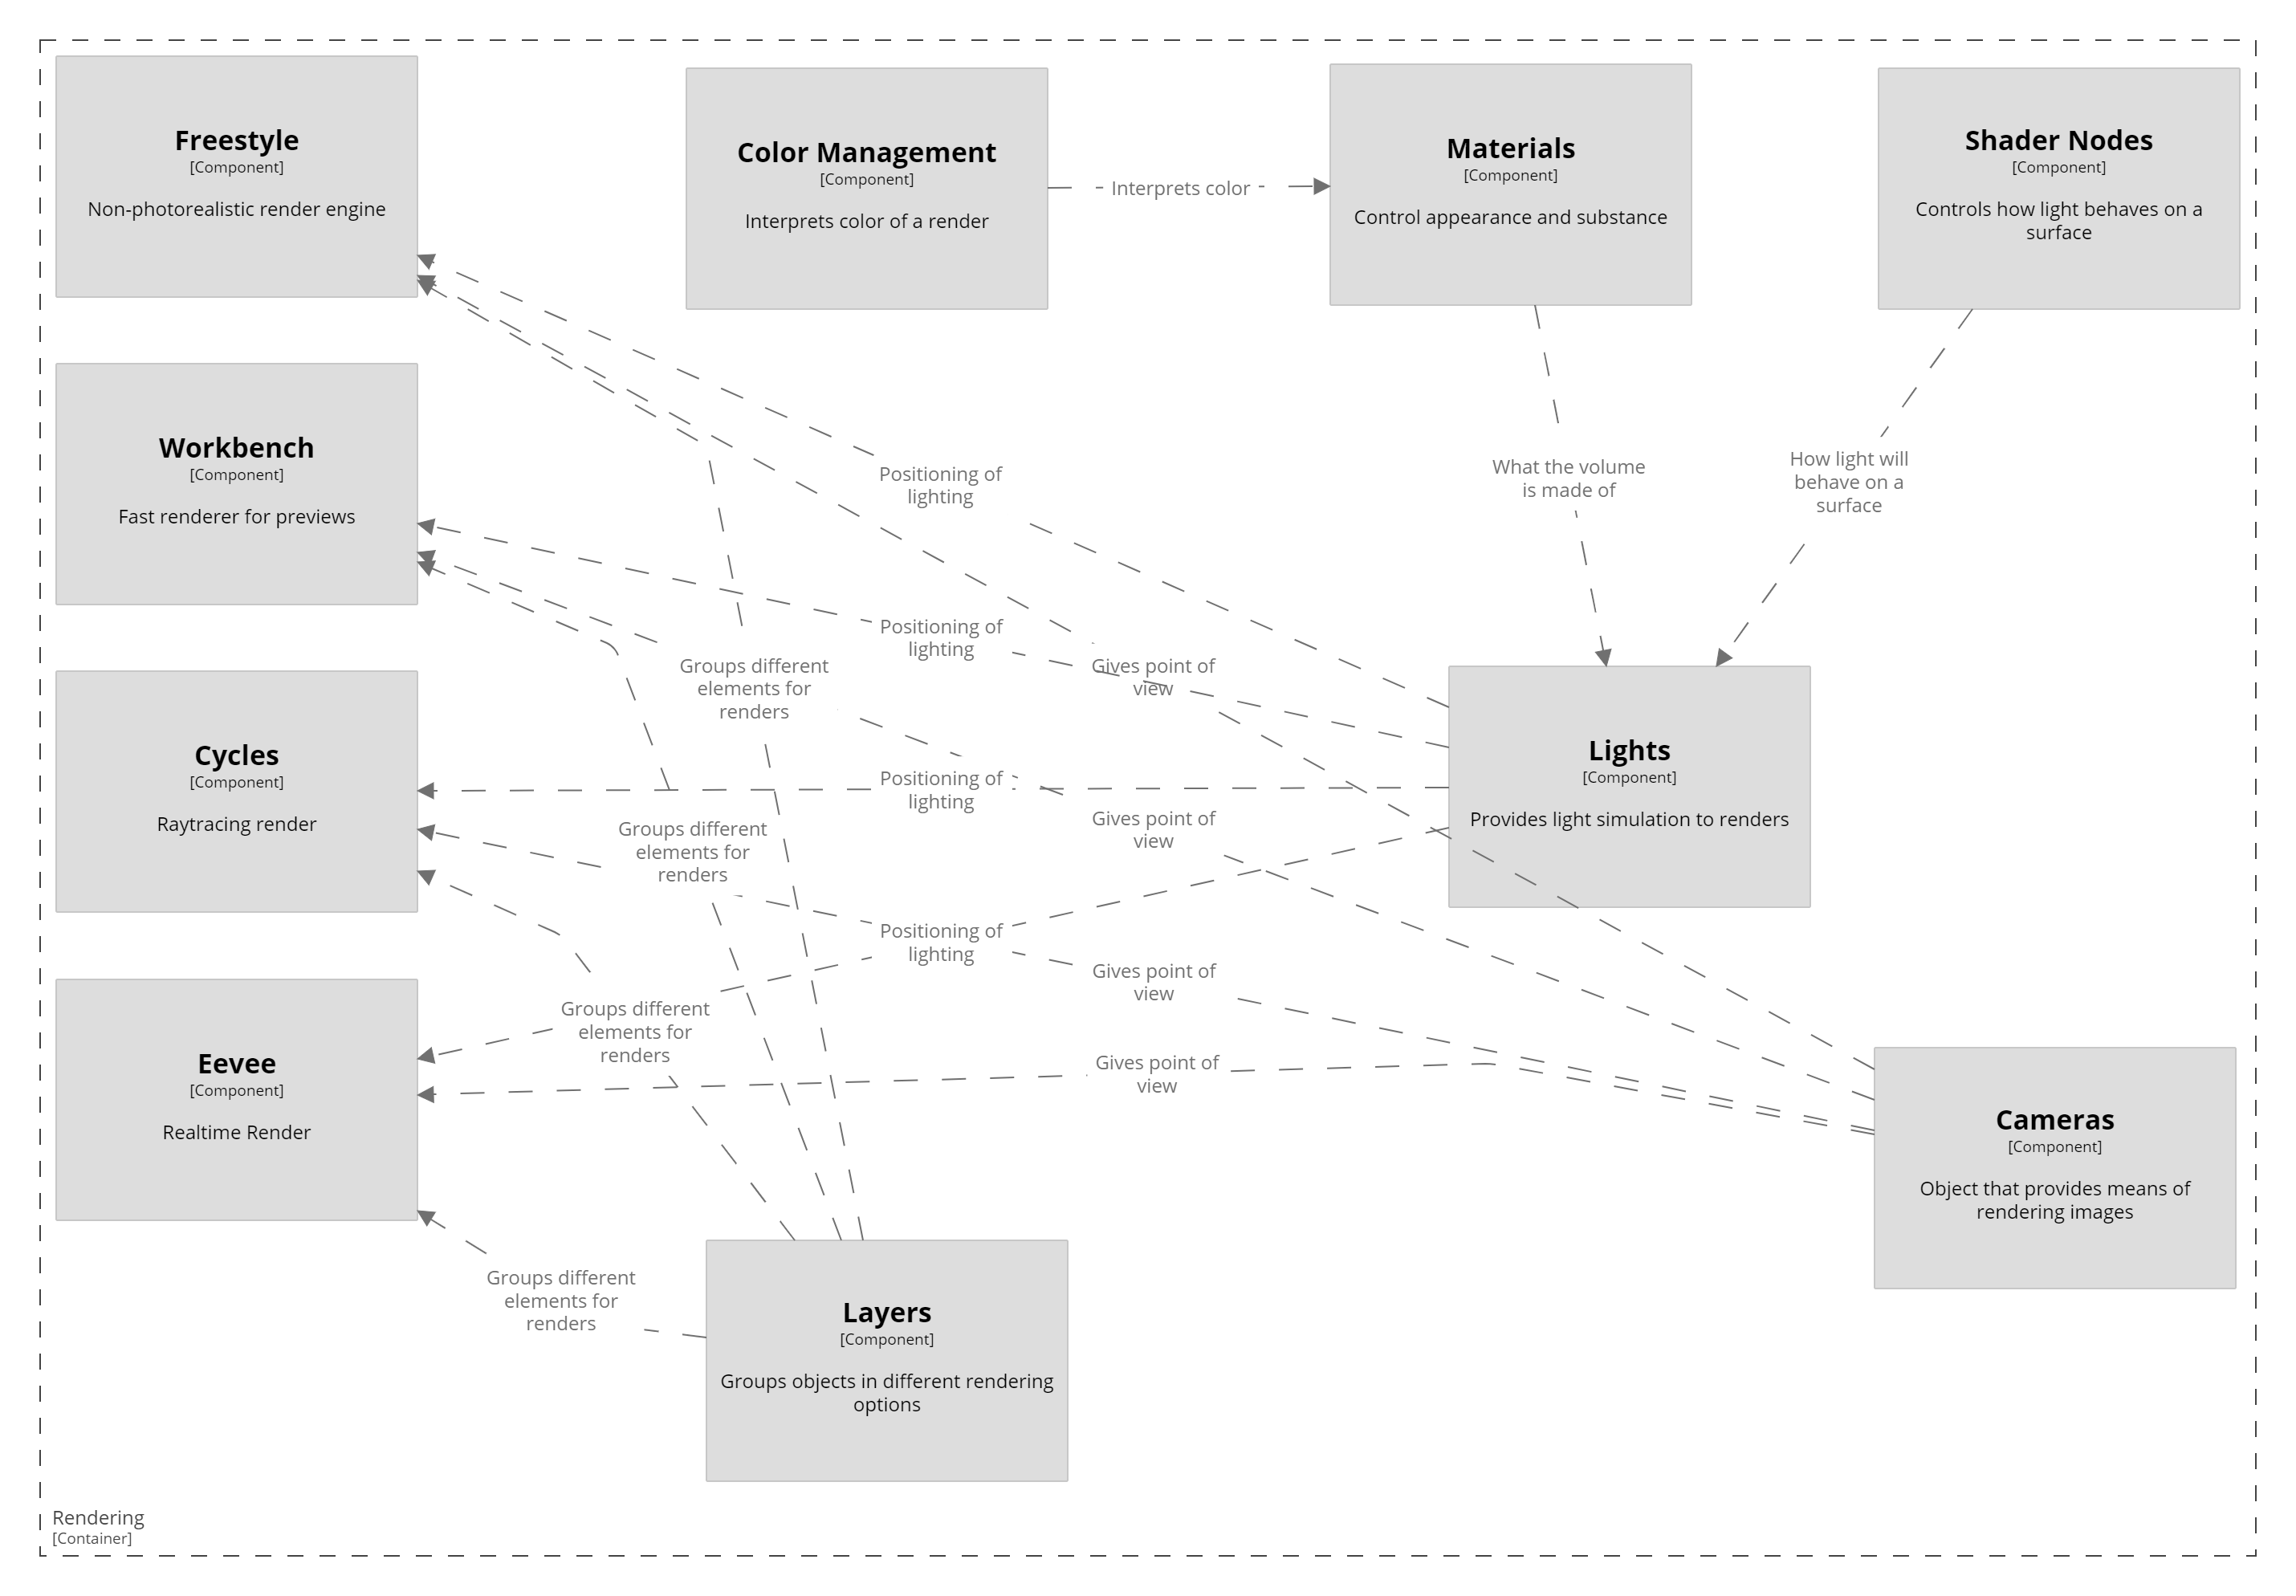
Blender counts with a variety of rendering options, the rendering process transforms a 3D scene into a 2D image. Each renderer has a different objective.
Eevee:
The most recenltly incorporated engine, Eevee’s strengths lie in it’s realtime rendering capabilities and high realistic value on lower requierements than Cycles.
Cycles:
The prefered rendering option for finalizing a proyect, cycles is a physically based path tracer that is very precise and takes a long time to finish a render, however, it provides higher quality outputs.
Workbench:
Designed for previews, this is not a renderer used for finalizing proyects, only for a quick preview of what is being modeled. Renders very fast for low quality models.
Freestyle:
An edge/line-based non-photorealistic renderer, this option is used for more “cartoon” or “anime” style art proyects. It has high memory demand as it loads all layers at once.
Other Components:
The rest of the components provide settings for the renderer to use when calculating how the image with result in the end. In a sense, these all work for the different renderers in a similar fashion.
Layers:
A layer is what groups different objects in a scene to be rendered a certain way, all grouped objects in a layer recieve the same settings from the other components.
Cameras:
Provides the renderer with a point of view, a place from where an observer is standing.
Lights:
Provides with light settings to include points of light with different shapes and intensity to iluminate the scene, the shaders then indicate how light behaves when it hits a certain object.
Shader Nodes:
Shaders are settings on surfaces that add effect to light incoming to the object, they can give reflective appearance, blurred reflections, roughness and other texture simulations depending on the settings.
Materials:
Similar to shaders, materials also change how light behaves on an object, but this includes the volume of the object itself, it can be dull or transparent or have a certain texture.
Color Management:
Indicates what color the surface of a material is, renderers rely on this component to get the coloring right for the final result.

Workflows
A render folllow maany possible workflows.
Color Flow:
First color is interpreted in the Color Management, then a material is applied to give the render some texture. Then lighting is applied according to spacial positioning, and finally it is sent to Eevee to be rendered realtime.
Shade Output:
From the raytracing or shadesamples comes the ShadeInput which moves into the shade output process. Here it is checked for characteristics that may need external processing, for example being “only-shadow”. Then the struct is texturized, modified to fit all visible lamps, adapted in areas like alpha and diffusion, and finally it exits with a filled in ShadeResult struct.
Raytracing:
Once a render has its ShadeResult it is placed in the space and the scene light is calculated onto it, according to the positions and sources of light that are found on the scene. This gives the render its lighting data, so then, if raytracing is on, it is sent to the Cycles raytracing render to be calculated and rendered into an image.